Phone Wiring Guide: A Comprehensive Overview (Updated 04/22/2026)
Today, April 22, 2026, at 11:54:20, this guide offers a detailed exploration of telephone and internet socket wiring, streamlining workflows and boosting productivity for users․
Understanding Telephone Wiring Basics
Telephone wiring, though seemingly simple, relies on a foundational understanding of connectivity and signal transmission․ Historically, systems utilized dedicated wiring for voice communication, but modern setups often integrate phone lines with internet services, sharing infrastructure․ The core principle involves establishing a clear path for the analog signal representing your voice․
Understanding the components is crucial․ This includes the network interface, internal wiring, and the phone itself․ Older installations might feature a demarcation point (Demarc), separating the provider’s responsibility from the homeowner’s․
Reddit discussions highlight the importance of identifying correct wiring configurations, even when using unconventional setups․ A user manual emphasizes maximizing product efficiency through a comprehensive overview of the system․ Successfully navigating these basics ensures reliable phone service and optimal performance․
Types of Telephone Wiring
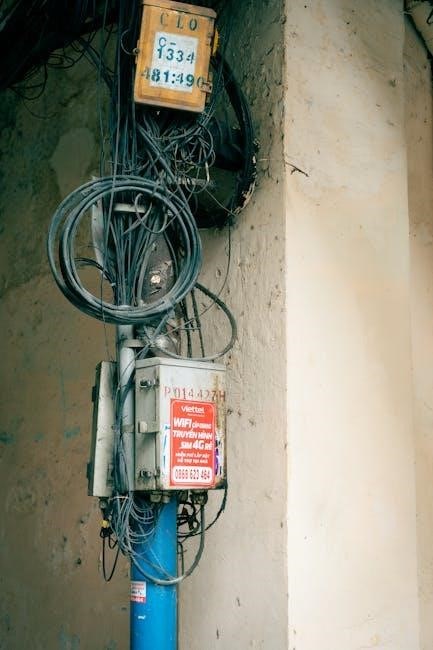
Historically, telephone wiring primarily consisted of single-pair twisted wire, sufficient for basic voice communication․ However, the integration of internet services spurred the adoption of multi-pair cables, commonly 8-conductor wires, capable of supporting multiple lines and data transmission simultaneously․ These cables often utilize color-coded conductors for easy identification․
Modern homes may encounter various wiring types, including Category 5e (Cat5e) or Category 6 (Cat6) cables, initially designed for data networking but adaptable for phone lines․ The choice depends on the desired bandwidth and future-proofing considerations․
Reddit discussions point to the practical reality of utilizing available wiring, even if not ideal, like repurposing 8-conductor cables․ A user manual stresses maximizing efficiency, implying adapting wiring to suit specific needs․ Understanding these types allows for informed decisions during installation or troubleshooting․
RJ11 Connectors: The Standard
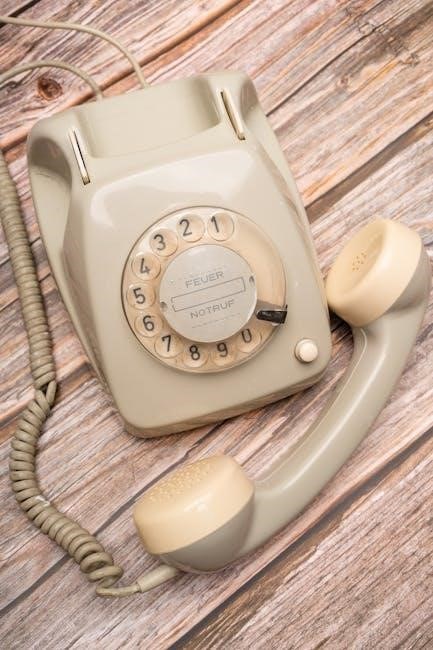
The RJ11 connector is universally recognized as the standard for connecting telephone devices․ Despite its seemingly simple design, understanding its configuration is crucial for successful wiring․ Typically, RJ11 connectors utilize between two and six wire positions, though four or six are most common for modern installations․
Reddit discussions highlight the importance of proper pin alignment within the RJ11 jack, noting that the connector should center itself correctly, even when using repurposed wiring․ This self-centering feature ensures a reliable connection․
While seemingly straightforward, correct RJ11 termination is vital․ A user manual emphasizes maximizing product utility, which inherently relies on secure and properly connected RJ11 interfaces․ Incorrect connections can lead to signal loss or complete communication failure․
Solid vs․ Stranded Wire for Phone Lines
Choosing between solid and stranded wire for phone lines is a fundamental decision impacting installation and performance․ Solid core wire, consisting of a single copper strand, is generally preferred for in-wall runs due to its durability and ability to maintain a consistent signal over longer distances․ It’s ideal for punch-down connections․
Stranded wire, composed of multiple thinner strands, offers greater flexibility, making it suitable for patch cables and connections that require frequent movement․ However, stranded wire is more prone to signal degradation over extended lengths․
Considering the Reddit discussions about repurposing existing wiring, understanding the wire type already in place is crucial․ A user manual’s emphasis on maximizing product utility extends to selecting the appropriate wire for optimal signal integrity and long-term reliability․
Essential Tools for Phone Wiring
To effectively tackle phone wiring projects, you’ll require specialized tools like wire strippers, a punch-down tool, and a cable tester for connectivity assurance․
Wire Strippers and Cutters
Wire strippers are fundamental for exposing the conductive core of telephone wires without damaging them․ Selecting the correct stripper size is crucial; different gauges require different settings to prevent nicking or completely severing the wire․ A quality stripper will feature multiple notches, clearly labeled for various wire thicknesses commonly found in phone cabling – typically 22 to 26 AWG․
Beyond stripping, having a dedicated cutter is equally important for clean, precise wire ends․ Dull cutters can crush the wire, leading to poor connections and signal degradation․ Look for cutters with a sharp, hardened steel blade designed for repetitive use․ Some tools combine stripping and cutting functions, offering convenience, but dedicated tools often provide superior performance and longevity․ Remember to always inspect wires for damage after stripping and cutting before proceeding with connections․
Punch Down Tool
A punch down tool is essential when terminating wires onto a telephone block or patch panel․ This specialized tool firmly seats each wire into its designated slot, ensuring a reliable electrical connection․ It operates by forcing the wire’s conductor into a slot within the block, simultaneously cutting off the excess wire length․ Different tools accommodate various block types – 66 and 110 being the most common․
Using the correct blade type for your block is vital to avoid damaging the block or the tool itself․ The impact force needs to be sufficient for a secure connection, but not so strong as to crack the plastic housing; Proper technique involves holding the tool perpendicular to the block and applying consistent pressure․ Always verify each connection with a cable tester after punch-down to confirm conductivity and prevent signal loss․
Cable Tester: Ensuring Connectivity
A cable tester is a crucial component of any phone wiring project, verifying the integrity of your connections before putting them into service․ These devices send a signal through each wire and confirm whether it reaches the other end without interruption․ Basic testers illuminate lights to indicate continuity on each wire pair, while more advanced models can identify shorts, opens, and miswires․
Testing is particularly important after using a punch down tool, ensuring each wire is securely seated․ Before testing, disconnect the line from the phone company’s demarc point for safety․ A successful test confirms a clear signal path, preventing issues like no dial tone or static․ Regularly testing existing lines can also proactively identify deteriorating connections before they cause service disruptions, saving time and frustration․
Wiring Schemes & Color Codes
Understanding USOC standards, T568A/B configurations, and proper color coding is essential for reliable phone line connections, ensuring optimal signal transmission and functionality․
USOC Color Code Explained
The Universal Service Ordering Code (USOC) color code provides a standardized system for identifying individual wires within telephone cabling․ This consistency is crucial for accurate wiring and troubleshooting․ Traditionally, solid colors represent individual conductors, while color combinations with white stripes signify their paired counterparts․
Commonly, white/blue is paired with blue, white/orange with orange, white/green with green, and white/brown with brown․ Black and red wires are often used for voice or data, though their specific function can vary depending on the wiring scheme․
Understanding this code is vital when connecting RJ11 connectors or working with punch-down blocks․ Incorrect wiring based on the USOC standard can lead to a loss of signal, static, or complete communication failure․ Always refer to a USOC chart during installation or repair to ensure proper connections and optimal performance of your telephone system․
T568A vs․ T568B Wiring Standards
Two primary wiring standards exist for terminating telephone cables: T568A and T568B․ While both function correctly, consistency is paramount; mixing them within a single connection will cause issues․ T568B is the more commonly used standard in North America, prioritizing ease of use with Ethernet cabling, but T568A remains valid․
The key difference lies in the arrangement of the orange and green wire pairs․ T568A places green first, followed by orange, while T568B reverses this order․ Choosing one and adhering to it throughout your installation is crucial for reliable connectivity․
When dealing with existing infrastructure, identify the standard already in use to avoid conflicts․ Using the wrong standard can result in no dial tone or intermittent service․ Always double-check your wiring against a T568A or T568B diagram before finalizing connections․
Wiring for Single Line Phones
Wiring a single line phone is the most basic telephone installation․ Typically, you’ll utilize an RJ11 connector and follow either the T568A or T568B wiring scheme – consistency with existing wiring is key․ The central two pins (typically orange and white, and blue and white) are most commonly used for a single phone line, though the exact pins depend on the chosen standard․
Ensure the red and black wires, often found in 8-conductor cables, aren’t utilized for a standard single-line phone connection․ Focus on the inner four wires for a reliable signal․ Proper termination of the wires into the RJ11 connector is vital; a snug fit ensures a stable connection․
After wiring, always test the connection with a cable tester to confirm a dial tone before connecting your phone․
Troubleshooting Common Phone Wiring Issues
Addressing problems like no dial tone or static, this section guides you through identifying and resolving frequent issues impacting phone line clarity and connectivity․
No Dial Tone: Identifying the Problem
A complete lack of dial tone is often the first sign of a phone wiring issue․ Begin by verifying the phone itself is functioning correctly – test it in a known working jack․ If the phone works elsewhere, the problem lies within the wiring or the original jack․
Next, check the cable connection to the wall․ Ensure it’s securely plugged in․ Inspect the cable for any visible damage, like cuts or kinks․ If using a splitter, bypass it to see if that’s the source of the issue․
Consider the demarcation point (Demarc), where the phone company’s responsibility ends․ A faulty Demarc can cause a complete loss of service․ If problems persist, contacting your service provider is crucial for testing the line from their end and identifying potential external issues․ Remember to document all troubleshooting steps taken․
Static on the Line: Causes and Solutions
Persistent static on your phone line indicates interference, often stemming from wiring issues or external sources․ Begin by inspecting phone cables for damage, as frayed or poorly shielded wires can introduce noise․ Check for nearby electrical devices – microwaves, fluorescent lights, and even some older appliances – that might be causing electromagnetic interference․
Loose connections within wall jacks or at the demarcation point (Demarc) can also contribute to static․ Tighten all connections and ensure wires are securely seated․ If the static coincides with internet usage, there might be interference between phone and data lines, especially if sharing wiring․

Consider using a filtered phone line or moving the phone further from potential interference sources․ If the problem persists, contact your phone provider to investigate external line issues․
Interference with Internet Service
When phone wiring impacts internet service, the issue often arises from shared wiring or electromagnetic interference․ DSL internet utilizes phone lines, making it susceptible to disruptions caused by faulty wiring or noise on the line․ Static, as previously discussed, can significantly degrade DSL signal quality, leading to slow speeds or dropped connections․
Ensure phone and internet signals aren’t crossing improperly within the wiring setup․ Utilizing the correct pins within RJ11 connectors (blue/blue-white for data, as suggested by r/DIY discussions) is crucial․ Poorly shielded cables or loose connections can also introduce interference․
If problems persist, try isolating the phone line to see if internet performance improves․ Contacting your internet service provider for a line test is recommended․
Advanced Phone Wiring Configurations
Exploring complex setups, this section details wiring for multiple lines, PBX systems, and utilizing the demarcation point for optimal network performance and control․
Wiring for Multiple Phone Lines
Expanding beyond a single line requires careful planning and execution․ When wiring for multiple phones, you’ll typically utilize a central distribution point, often within a wiring closet or near the network demarcation point․ Each phone line necessitates a dedicated pair of wires, adhering to the USOC color code for consistent identification․
Consider using a 6 or 8-conductor cable to accommodate future expansion․ A punch-down block is crucial for neatly terminating the wires and creating a reliable connection․ Ensure each line is properly tested with a cable tester to verify continuity and eliminate potential issues like static or no dial tone․
Proper cable management is vital to prevent tangling and signal interference․ Label each line clearly at both ends for easy troubleshooting․ Remember that running multiple lines can increase the complexity, so meticulous attention to detail is paramount for a functional and organized phone system․
Connecting a Phone System (PBX)
Integrating a Private Branch Exchange (PBX) system demands a structured wiring approach․ PBX systems centralize phone line management, offering advanced features like call routing and voicemail․ Connecting requires running multiple lines from the network demarcation point or a central wiring closet to the PBX unit itself․
Utilize category 5e or 6 cabling for optimal performance and future-proofing․ Ensure proper termination using RJ11 connectors and adherence to the T568A or T568B wiring standard – consistency is key․ The PBX system will have specific port assignments for incoming lines and extensions; consult the PBX manual for detailed instructions․
Thorough testing with a cable tester is crucial after installation to verify each line’s functionality․ Proper grounding and surge protection are essential to safeguard the PBX and connected phones from electrical damage․ Careful planning and execution will ensure a reliable and feature-rich phone system․
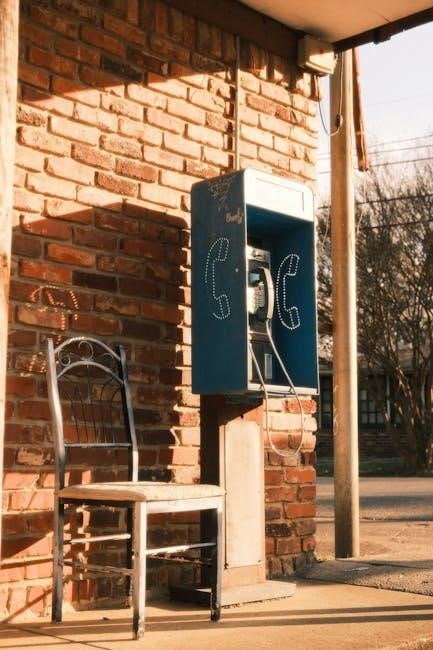
Using a Demarcation Point (Demarc)
The demarcation point, or “demarc,” signifies the boundary between the telephone company’s responsibility and the homeowner’s․ It’s typically a grey box located outside or inside your property, housing the initial connection to the phone network․ Understanding its function is vital for troubleshooting and managing your phone lines․
Before performing any internal wiring, always identify the demarc․ Testing connectivity at the demarc isolates whether issues stem from the provider’s lines or your internal wiring․ Accessing the demarc often requires a key, usually provided by the phone company․
Never tamper with the wiring inside the demarc – this is the provider’s domain․ If problems persist beyond the demarc, contact your telephone service provider for assistance․ Proper use of the demarc streamlines diagnostics and ensures efficient resolution of phone line issues․

Safety Precautions When Wiring Phones
Always prioritize safety when working with low voltage electricity and wiring․ Avoid damaging cables, practice proper cable management, and disconnect power before starting any work․
Working with Low Voltage Electricity
While telephone wiring deals with low voltage, it’s crucial to remember that electricity, even at lower voltages, demands respect and caution․ Never assume a wire is safe simply because it’s a phone line․ Always disconnect the phone line at the network interface – often a demarcation point or terminal block – before beginning any wiring work․
This prevents accidental shorts or electrical shocks․ Use insulated tools specifically designed for electrical work․ Avoid working in damp or wet conditions, as water significantly increases the risk of electrical hazards․ Inspect all wiring for damage, such as frayed insulation, before handling it․ If damage is present, replace the wire immediately․
Remember that even a small shock can be unpleasant and potentially dangerous, especially for individuals with pre-existing health conditions․ Prioritize safety by following these guidelines diligently during every stage of your phone wiring project․
Avoiding Damage to Wiring

Protecting your phone wiring from physical damage is paramount for reliable service and long-term functionality․ Avoid sharply bending or kinking the wires during installation, as this can compromise the internal conductors and lead to signal degradation․ Secure wiring properly using staples or cable ties, ensuring they aren’t overly tight, which could crush the cable․
Route wires away from potential hazards like sharp edges, heat sources, and areas prone to moisture․ When drilling holes for wiring, use appropriate drill bits and ensure the holes are smooth to prevent abrasion․ Be mindful of pets or rodents that might chew on cables․
Regularly inspect exposed wiring for signs of wear and tear, and address any issues promptly․ Proper cable management not only prevents damage but also maintains a neat and organized installation․
Proper Cable Management
Effective cable management is crucial for a clean, organized, and functional phone wiring setup․ Bundle cables neatly using Velcro straps or cable ties, avoiding overly tight bindings that could damage the wires․ Route cables along baseboards, through wall conduits, or within cable trays to conceal them and protect them from physical harm․
Label each cable clearly at both ends to simplify troubleshooting and future modifications․ Avoid crossing phone cables with electrical wiring to minimize interference․ Maintain sufficient slack in the cables to allow for movement and prevent strain on connections․
Consider using color-coded cables to easily identify different lines or services․ A well-managed cabling system enhances aesthetics, improves airflow, and simplifies maintenance, contributing to a reliable phone network․