
Ore-Ida Tater Tots are a beloved frozen food made from 100% real potatoes, offering a crispy texture and fresh flavor. Since 1952, they’ve become a versatile dish for any meal, easily cooked in ovens, air fryers, or deep fryers to achieve golden perfection. Their convenience and delicious taste make them a favorite for families and chefs alike, perfect as a side or incorporated into creative recipes.
Overview of Ore-Ida Tater Tots
Ore-Ida Tater Tots are a popular frozen food product made from 100% real potatoes, known for their crispy exterior and fluffy interior. They are a convenient and versatile option for various meals, from snacks to main dishes. These bite-sized potato pieces are easy to prepare using multiple cooking methods, including baking, deep-frying, or air frying. Their golden color and delicious flavor make them a favorite for both children and adults. Ore-Ida Tater Tots are also a key ingredient in many creative recipes, such as loaded casseroles or breakfast dishes. Their consistency and taste have made them a staple in many households, offering a quick and satisfying solution for mealtime. Whether served as a side or incorporated into a larger recipe, Ore-Ida Tater Tots remain a beloved choice for their simplicity and flavor.
History of Ore-Ida and Tater Tots

Ore-Ida, a brand known for its high-quality frozen potato products, was founded in 1952 by F. Nephi Grigg and Golden Grigg. The name “Ore-Ida” reflects the company’s roots in Oregon and Idaho, where the potatoes are sourced. The Tater Tot, one of their most iconic creations, was invented in 1953 by F. Nephi Grigg as a solution to repurpose leftover potato scraps. This innovative product quickly gained popularity due to its convenience and delicious taste. Over the years, Ore-Ida has become a trusted name in households worldwide, and its Tater Tots remain a beloved choice for meals and snacks. The brand’s commitment to quality and innovation has solidified its place in the frozen food industry, making Ore-Ida Tater Tots a timeless favorite for generations.
Cooking Instructions for Ore-Ida Tater Tots
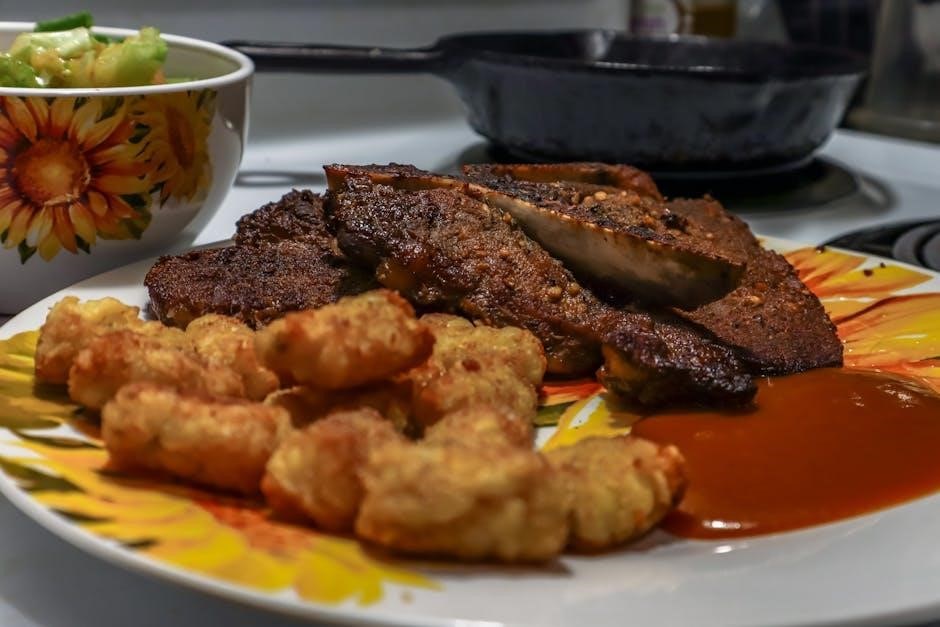
Ore-Ida Tater Tots are versatile and easy to prepare using various methods. Whether baked, deep-fried, air-fried, or pan-fried, they deliver a crispy exterior and fluffy interior. Always follow package instructions for optimal results.
Oven Cooking Method
Cooking Ore-Ida Tater Tots in the oven is a simple and healthy alternative to deep-frying. Preheat your oven to 425°F (220°C). Spread the frozen Tater Tots in a single layer on a baking sheet lined with non-stick cooking spray or lightly brushed with oil. This ensures even cooking and prevents sticking. Bake for 20-25 minutes, flipping the Tater Tots halfway through to achieve an evenly crispy texture. They are done when golden brown and crispy. For extra crispiness, you can broil for an additional 2-3 minutes, but keep an eye to avoid burning. Allow them to cool slightly before serving. This method yields a delicious, oven-roasted flavor with minimal effort, making it a great option for a quick and tasty side dish or snack.
Deep-Frying Method
Deep-frying Ore-Ida Tater Tots yields a crispy, golden exterior while maintaining a fluffy interior. Heat 2-3 inches of vegetable oil (such as canola or peanut oil) in a deep frying pan to 375°F. Once the oil is hot, carefully add the frozen Tater Tots in batches to avoid overcrowding the pan. Fry for 3-4 minutes or until golden brown, turning occasionally for even cooking. Use a slotted spoon to remove the Tater Tots and place them on a paper towel-lined plate to drain excess oil. Repeat with remaining batches. For the best results, do not overcrowd the pan, as this can lower the oil temperature and result in greasy tots. Serve hot and enjoy the classic, crispy texture that deep-frying provides. This method is ideal for achieving the traditional Tater Tot taste and texture.
Air Fryer Cooking Method
Cooking Ore-Ida Tater Tots in an air fryer is a healthier alternative to deep-frying, yielding crispy results with minimal oil. Preheat the air fryer to 400°F (200°C) for 2-3 minutes. Spread the frozen Tater Tots in a single layer in the air fryer basket, ensuring they are not overcrowded. Cook for 12-15 minutes, shaking the basket halfway through to ensure even cooking. For extra crispiness, lightly spray the Tater Tots with cooking oil before cooking. The tots are done when golden brown and crispy. Patience is key, as overcrowding can lead to uneven cooking. This method is perfect for achieving a delicious, oil-free snack or side dish with minimal effort and cleanup. Serve hot for the best flavor and texture.
Microwave Cooking Method
Cooking Ore-Ida Tater Tots in the microwave is a quick and convenient option for a crispy snack or side dish. Start by placing the desired amount of frozen Tater Tots on a microwave-safe plate, spreading them out in a single layer to ensure even cooking. Cook on high for 3-4 minutes, depending on your microwave’s power level. Check the Tater Tots after 3 minutes; if they aren’t crispy enough, continue cooking in 30-second increments until golden brown. Be cautious not to overcook, as they can become dry. For extra crispiness, lightly spray the Tater Tots with cooking oil before microwaving. Once cooked, remove them from the microwave and serve hot. This method is ideal for small portions or when time is limited, offering a fast and easy way to enjoy crispy Tater Tots without the need for additional appliances.
Pan-Frying Method
Pan-frying Ore-Ida Tater Tots is a fantastic way to achieve a crispy exterior while keeping the inside fluffy. Heat about 1-2 inches of vegetable oil in a large skillet over medium-high heat until it reaches 350°F. Once the oil is hot, carefully add the frozen Tater Tots in a single layer, avoiding overcrowding the pan. Cook for 3-4 minutes on each side, or until they turn golden brown. Repeat in batches if necessary. Using a slotted spoon, remove the Tater Tots from the oil and place them on paper towels to drain excess oil. For added crispiness, you can lightly dust them with seasonings immediately after frying. Pan-frying is a great method for those who prefer a more traditional fried texture without the need for a deep fryer. It’s a simple yet effective way to enjoy Tater Tots with a satisfying crunch.

Tips for Perfect Tater Tots
For crispy Tater Tots, arrange them in a single layer and pat dry with paper towels before cooking. Use the right oil temperature for golden results.
How to Achieve Crispy Texture
Achieving a crispy texture with Ore-Ida Tater Tots starts with proper preparation. Pat the Tater Tots dry with paper towels before cooking to remove excess moisture. Arrange them in a single layer on a baking sheet or in the air fryer basket to ensure even cooking. For oven or air fryer methods, cook at 400°F (200°C) for 20-25 minutes, shaking halfway through, until golden brown. When deep-frying, use oil heated to 375°F (190°C) and fry for 3-4 minutes, or until golden. After cooking, drain on paper towels to remove excess oil; Lightly tossing the Tater Tots while hot can enhance crispiness. Avoid overcrowding the cooking surface, as this can prevent even browning. Adjust cooking times slightly depending on your preferred level of crispiness. Following these steps ensures a perfectly crispy exterior while maintaining a fluffy interior.
Importance of Single Layer Arrangement
Arranging Ore-Ida Tater Tots in a single layer is crucial for achieving optimal results. This ensures even cooking and prevents the Tater Tots from sticking together. When overcrowded, they steam instead of crisp, leading to a less desirable texture. A single layer allows air to circulate freely, promoting uniform browning and crispiness. For oven cooking, spread them across a large baking sheet. In an air fryer, cook in batches if necessary to maintain a single layer. Similarly, when pan-frying, avoid overcrowding the skillet. Proper spacing ensures each Tater Tot cooks individually, resulting in a crunchy exterior and fluffy interior. Always check the cooking surface size and adjust the quantity accordingly. Neglecting this step can lead to uneven cooking and a less satisfying final product. Following this simple guideline enhances the overall quality of your Tater Tots, making them a perfect addition to any meal.
Role of Oil in Cooking
Oil plays a vital role in achieving the perfect texture and flavor when cooking Ore-Ida Tater Tots. It ensures crispiness by preventing sticking and promoting even browning. For deep-frying, oil is essential as it directly cooks the Tater Tots to a golden crisp. In pan-frying, a small amount of oil is needed to prevent them from adhering to the pan and to enhance their golden-brown color. Even in oven cooking, lightly brushing the baking sheet with oil can help achieve a crisper texture. Using the right type of oil, such as vegetable or canola oil, is recommended for high-heat cooking to avoid burning. Additionally, oil can be used to toss Tater Tots with seasonings, ensuring flavors are evenly distributed. While some methods require more oil than others, its presence is key to achieving the desired crunch and flavor. Proper oil usage balances crispiness and prevents sogginess, making it a crucial element in any cooking method.

Common Variations and Recipes
Tater Tots inspire countless creative dishes, from loaded casseroles to breakfast skillets. Custom seasonings and toppings add personal flair, while recipes like cheesy casseroles and breakfast Tater Tot dishes delight families worldwide.
Loaded Tater Tot Casserole
A Loaded Tater Tot Casserole is a hearty, flavorful dish perfect for family meals or gatherings. It typically layers Ore-Ida Tater Tots with ground beef, shredded cheese, and creamy sauces. The casserole is baked until golden and bubbly, offering a comforting blend of textures and tastes. Optional toppings like sour cream, bacon bits, or chives can enhance its appeal. This versatile recipe allows for customization, making it a crowd-pleaser. By combining simple ingredients with the convenience of Tater Tots, it’s an easy yet satisfying meal option.
Breakfast Tater Tot Dish
A Breakfast Tater Tot Dish is a creative and delicious twist on traditional morning meals. This recipe combines crispy Ore-Ida Tater Tots with scrambled eggs, crumbled bacon or sausage, and shredded cheese. The Tater Tots are baked until golden, then topped with the breakfast mixture. Optional additions like diced veggies or salsa can add extra flavor. Perfect for brunch or a quick breakfast, it’s a crowd-pleasing dish that blends the convenience of Tater Tots with hearty breakfast elements. This recipe offers a fun and easy way to start the day with a satisfying, filling meal.
Custom Seasonings and Toppings
Custom seasonings and toppings allow you to elevate Ore-Ida Tater Tots into a personalized culinary experience. Sprinkle garlic powder, paprika, or chili powder for a spicy kick, or try herbs like rosemary for a savory twist. For cheesy flavor, toss with grated Parmesan or cheddar while the tots are warm. Toppings like diced onions, sour cream, or bacon bits add texture and freshness. Experiment with sauces such as Sriracha mayo or BBQ sauce for a tangy, sweet, and spicy combination. These additions enhance the natural potato flavor and make Tater Tots versatile for any meal or snack. By exploring different seasonings and toppings, you can tailor the dish to suit your taste preferences, ensuring every bite is uniquely delicious and satisfying.

Storage and Reheating
Store Ore-Ida Tater Tots in the freezer at 0°F (-18°C) in their original packaging or an airtight container. For reheating, use the oven, microwave, or pan-fry methods to restore crispiness evenly.
Proper Freezer Storage
For optimal freshness, store Ore-Ida Tater Tots in the freezer at 0°F (-18°C). Keep them in their original packaging or transfer to an airtight container to prevent freezer burn. Ensure the container is sealed tightly to maintain quality. Avoid exposing the tater tots to temperature fluctuations, as this can affect texture and consistency. When storing, place the container in the coldest part of the freezer. Do not thaw and refreeze, as this can lead to moisture loss and a soggy texture. Always check the packaging for any signs of damage before storing. For best results, use frozen tater tots within 3 to 4 months of opening. Proper freezer storage helps preserve the crispy texture and fresh flavor of Ore-Ida Tater Tots for enjoyable meals year-round.
Reheating Methods for Leftovers
Reheating Ore-Ida Tater Tots leftovers can be done using various methods to maintain their crispy texture. For oven reheating, preheat to 400°F (200°C), spread tater tots in a single layer on a baking sheet, and bake for 10-12 minutes. In an air fryer, reheat at 375°F (190°C) for 5-7 minutes, shaking halfway. For microwave reheating, place tater tots on a paper towel-lined plate, heat for 20-30 seconds, and check for crispiness. Pan-frying is another option: heat a skillet with a small amount of oil over medium heat, add tater tots in a single layer, and cook for 2-3 minutes on each side until golden. Avoid overcrowding to ensure even reheating. These methods help restore the tater tots’ crunch and flavor, making leftovers enjoyable once more.
Ore-Ida Tater Tots are a convenient and delicious addition to any meal, offering a crispy texture and hearty potato flavor. With multiple cooking methods—such as oven baking, deep-frying, air frying, and pan-frying—achieving perfectly cooked tater tots is simple. Whether you’re preparing a quick snack or a hearty casserole, Ore-Ida Tater Tots provide endless versatility. Their ability to be customized with seasonings and toppings makes them a versatile ingredient for both classic and creative dishes. Proper storage and reheating techniques ensure leftovers remain enjoyable, maintaining their signature crunch and flavor. From family dinners to casual gatherings, Ore-Ida Tater Tots consistently deliver a satisfying and crowd-pleasing experience, making them a timeless favorite in kitchens everywhere.